There are two different ways that I like to deal with slow motion footage coming out of digital video cameras. There is the quick conforming method and the After Effects method. Both are good for different applications. In any case, make sure the footage you start with has a decent number of frames. At minimum get 60 fps. If you slow down 24 fps (or 25, 30 fps) footage, it looks jerky no matter what. The more frames you capture, the more control you have in post to create your shot. Method 1 - Conforming
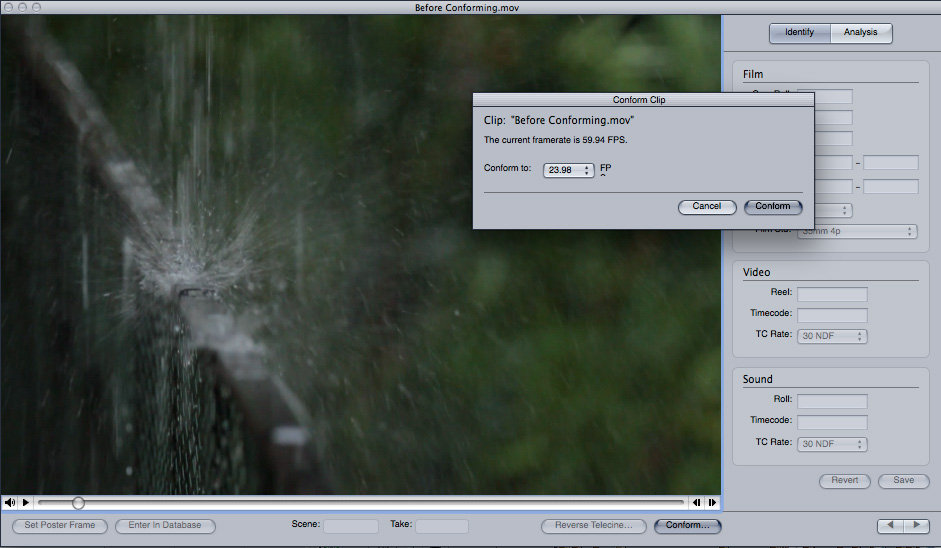
I like to use Cinema Tools, which comes with Final Cut Pro to conform my footage. Other editing applications have similar methods. Basically, conforming means that the footage I shot at lets say 60 fps will now be converted to play back at 24 fps, in slow motion. Step numero uno is to make a copy of the video file that you want to slow down. Put this copy in a separate folder that you can mark 'SlowMo.' In Cinema Tools, skip the 'database creation' option and open up your clip. On the bottom right you will see a conforming button. Press it and it will ask you which frame rate you want to conform to. I chose 23.98 for my example. When you click 'conform' the process is finalized, which also means the original video file has now been changed. That's why I made a copy first.
60fps footage before conforming
Play back the same video clip that you put in the SlowMo folder and you will see and hear the clip in slow motion. I like the fact that this process also slows down the audio for use in one of those slow motion punches where the dude getting hit cries "NOOOOOOOOOO!" KaBLAM! Very dramatic... 24fps footage after conforming
If you want even more control over your slow motion, then you might want to try...Method 2 - After Effects
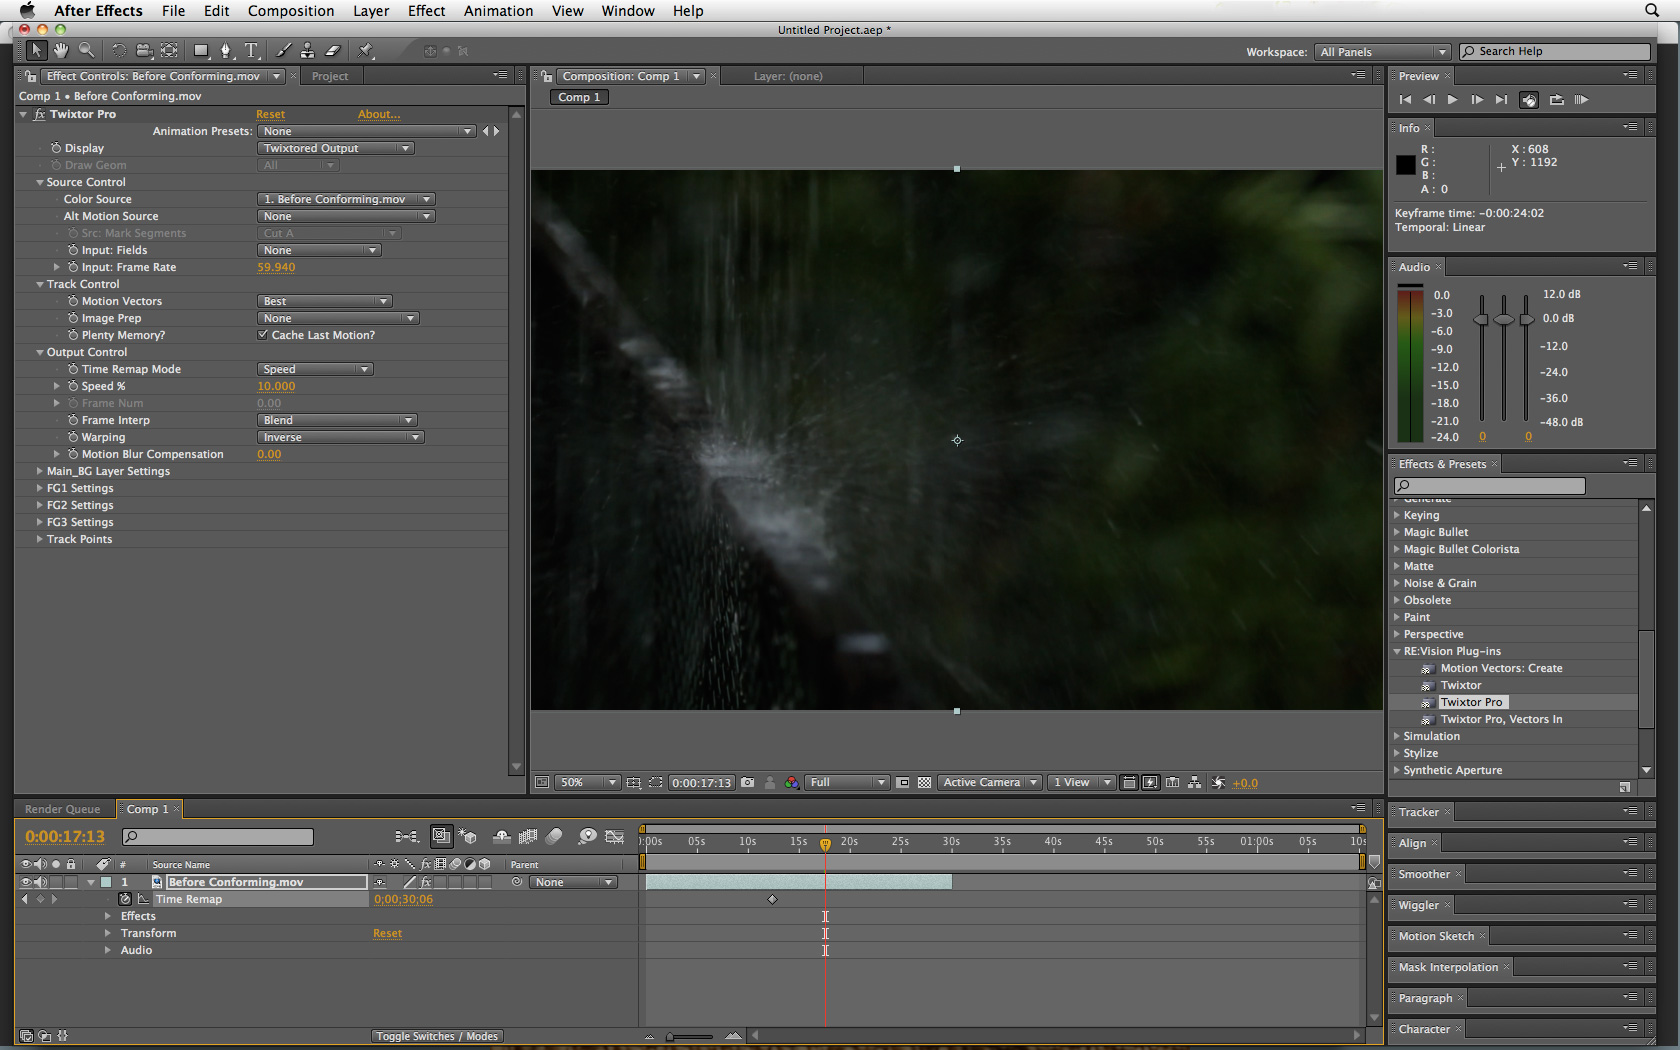
It is possible to do a lot of manipulation in After Effects. Much more than in Final Cut. I used Boris plugins and RE:Vision FX 'Twixtor Pro' for this example. I created a futuristic animated look by slowing down the footage by 90%, manipulating color and contrast levels, and adding a glow. 24fps footage - manipulated in After Effects
To slow down the footage with Twixtor, first start a new composition in After Effects. Then import the original 60fps footage. Don't worry, your original file will not be changed in any way. Drop your video clip into the composition timeline. Apply the Twixtor Pro effect. Make sure you also 'Enable Time Remapping.' In the effects panel, you have to tell Twixtor the correct 'Input Frame Rate.' In this case it's 59.94 (that's what 60fps footage runs at in video). Then you chose the kind of time manipulation you want to do. I choose to remap the time to 10% the original speed. I used the Time Remap handles in the timeline to chose exactly where the clip would start and stop because now that my footage is stretched out beyond the 30 seconds of the original footage length. RE:Vision has some nice tutorials and sample videos. Snehal Patel
Filmmaker
www.FearlessProductions.tv
I like to use Cinema Tools, which comes with Final Cut Pro to conform my footage. Other editing applications have similar methods. Basically, conforming means that the footage I shot at lets say 60 fps will now be converted to play back at 24 fps, in slow motion. Step numero uno is to make a copy of the video file that you want to slow down. Put this copy in a separate folder that you can mark 'SlowMo.' In Cinema Tools, skip the 'database creation' option and open up your clip. On the bottom right you will see a conforming button. Press it and it will ask you which frame rate you want to conform to. I chose 23.98 for my example. When you click 'conform' the process is finalized, which also means the original video file has now been changed. That's why I made a copy first.
60fps footage before conforming
Play back the same video clip that you put in the SlowMo folder and you will see and hear the clip in slow motion. I like the fact that this process also slows down the audio for use in one of those slow motion punches where the dude getting hit cries "NOOOOOOOOOO!" KaBLAM! Very dramatic... 24fps footage after conforming
If you want even more control over your slow motion, then you might want to try...Method 2 - After Effects
It is possible to do a lot of manipulation in After Effects. Much more than in Final Cut. I used Boris plugins and RE:Vision FX 'Twixtor Pro' for this example. I created a futuristic animated look by slowing down the footage by 90%, manipulating color and contrast levels, and adding a glow. 24fps footage - manipulated in After Effects
To slow down the footage with Twixtor, first start a new composition in After Effects. Then import the original 60fps footage. Don't worry, your original file will not be changed in any way. Drop your video clip into the composition timeline. Apply the Twixtor Pro effect. Make sure you also 'Enable Time Remapping.' In the effects panel, you have to tell Twixtor the correct 'Input Frame Rate.' In this case it's 59.94 (that's what 60fps footage runs at in video). Then you chose the kind of time manipulation you want to do. I choose to remap the time to 10% the original speed. I used the Time Remap handles in the timeline to chose exactly where the clip would start and stop because now that my footage is stretched out beyond the 30 seconds of the original footage length. RE:Vision has some nice tutorials and sample videos. Snehal Patel
Filmmaker
www.FearlessProductions.tv